How to Put Your Business on Google Maps
According to research in 2021, about 62% of the entire world population are active internet users. That’s about 4.66 billion people to market your business to online and one of the best ways to do that is with Google Maps and should be the very 1st thing you do when you want to build your rank, brand and reputation online.
Google has nearly 4 billion users and 70,000 searches every second. And in the United States, 72% of the entire population uses Google Maps.
There’s ample opportunity to put your business in the face of such a vast audience of potential customers. (GBP)
In this article, we will give you an easy-to-follow step-by-step guide on how to put your business on Google Maps.(Google makes changes all the time and I hope the steps below at least help)
How to Add Your Business on Google Maps
Below, we’ve outlined the steps you need to take to get your business on Google Maps, and then we’ll show you how to optimize your business listing with illustrations.
NOTE: To get listed on Google Maps as a business with a profile and all the information you need to land customers into today’s online space, you need a Google Business profile. You set both the Google Business profile and Google Maps listing at the same time. When embarking on a new online business venture, I highly recommend creating a separate Gmail account specifically for business purposes and refraining from using it for personal matters.
This account will serve as your primary Google account, free from any clutter or unnecessary information. The Google account you create will essentially become your key to unlocking the potential of internet traffic, as Google offers numerous services that can give your company a boost. However, it is important to note that utilizing these services may require a significant investment of both your finances and time. Google Maps cost less (free) and is more of the future trend! Expert GBP Company.
1. Create a Google account for your business
To create your profile on Google maps, you need to first have a Google account that is associated with your business. It must be associated with the location you want to add. It doesn’t necessarily have to be a Gmail account; any email account will suffice.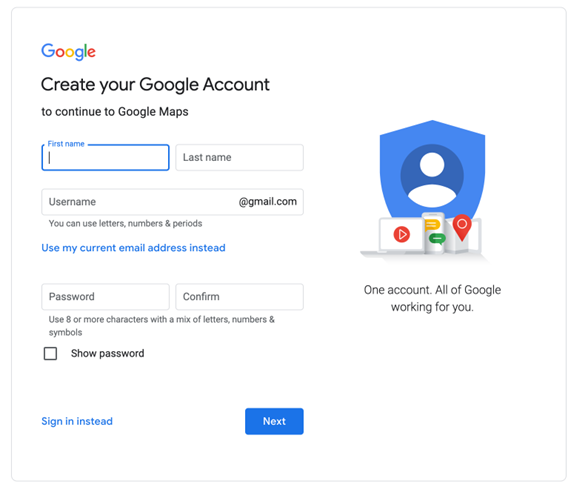
The account will be linked to your profile, and it will be what Google will make visible to visitors that come hanging around your profile.
If you don’t have a business account yet, click on www.gmail.com, then “sign in” then “more options” and then “create account”.
2. Go to Google My Business
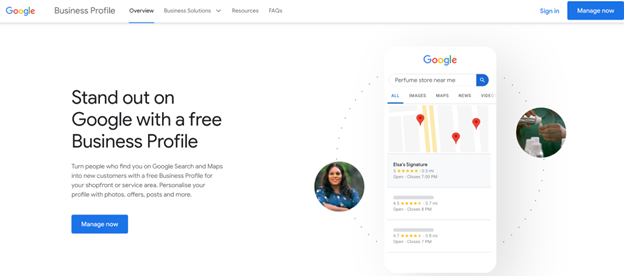
Now that you’ve created your business email account, click on www.google.com/business. As soon as the page loads, click on “Manage now”.
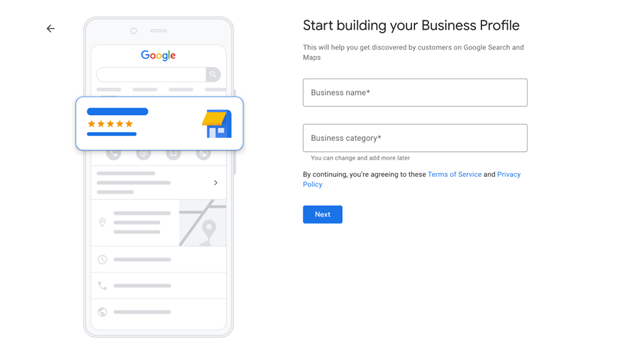
After clicking on this, you’ll get a form to put down the name of the business. If the name you put has not been used before, Google will attach it with “create a business with this name”.
If you are lucky, your business name will be available and you won’t have to try another business name. Click on “Add your business to Google”.
3. Fill in the required information
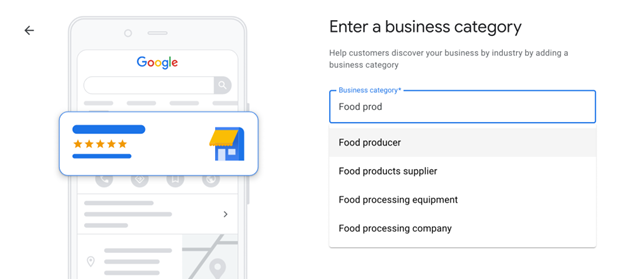
After you’ve clicked on “add your business to Google”, input the category your business best fits in just as seen in the screenshot below. This aspect is very important for Google to help rank your business.
When we talk about Google Maps marketing optimization below, we will give you some tips on how to use categories to rank higher on Google Maps so that you’ll boost the chances of finding customers through your Google Maps listing.
As soon as you are done with the categories, click “Next”.
The next thing to do is agree to Google’s terms and service and privacy policy. If you want to be sure of what you are signing in for, you can click on “Terms of Service” to read it and “Privacy Policy” to learn how your data is used.
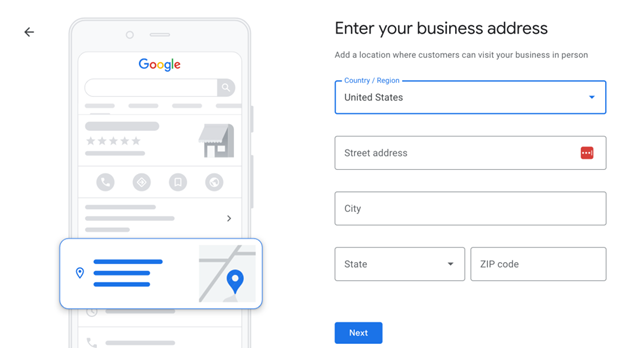
4. Add your business location
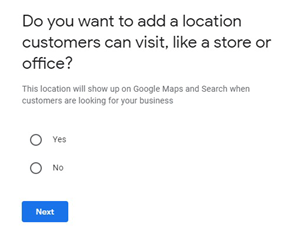
After clicking “Next”, Google will ask if you want to add a location customers can visit, like a store or an office. If you click yes, the location you add is what Google will display when customers are looking for your business.
It just makes the most sense to include a location since this is a Google “Maps” listing.
5. Input the actual address
When filling in the profile, make sure you type in the exact address of your business place. Don’t rush it. Cross-check and double-check before moving to the next.
Be very detailed and specific as possible. Include all relevant information and be exact. This address section is yet another optimization opportunity. As soon as you are done, click on “Next”.
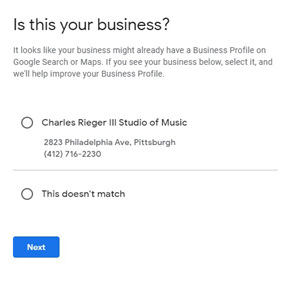
6. Fix wrong location on Google Maps (if it pops ups in your signup process)
If you see this, and you are not continuing the setup of a profile you started before, then you picked the wrong location. This is a way of Google telling you that you have picked a location that someone has once registered on the map before. And that means you chose the wrong location.
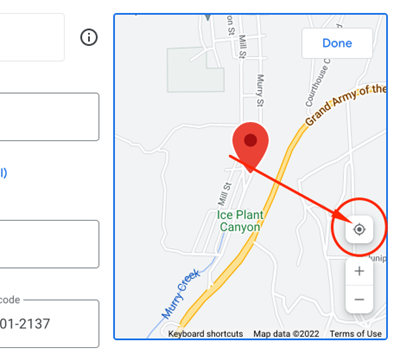
7. Pick your exact business location on the map
In this part, pick the exact spot on the map that you want Google to show your visitors. Zoom into the map and place the marker on the spot where your business is located.
If you are already at the location you want to use for your business, then that’s work made easy for you. Click on the navigation symbol and get that done right away.
8. Do you provide a delivery service?
Do you plan on making deliveries to your customers’ homes? You can indicate that in your listing.
If yes, you should then specify all locations you can reach out to. Although it is optional to get this aspect filled, since it will display on your profile, and it’s a thing your customers will love as many today prefer home deliveries.
9. Add your contact info
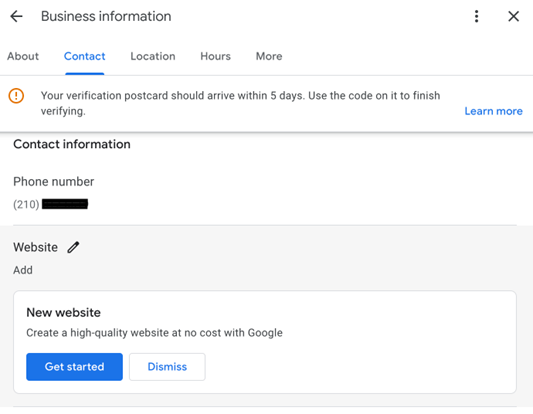
Add your business contact. It’s a plus if you include a local number to call. Also, if you have a website, add one.
10. Allow customers to send messages and leave reviews
Allowing reviews can give your profile a significant boost in ranking on Google Maps. You want to allow customers to say nice things about your business and also give feedback that’ll help you improve your business.
All information is vital — it’s either Google will need them to rank you high, or your customers’ will need it to know about your business better.
Now that you have completed and submitted every section of setting up on Google Maps, verify your account.
11. Verify your account
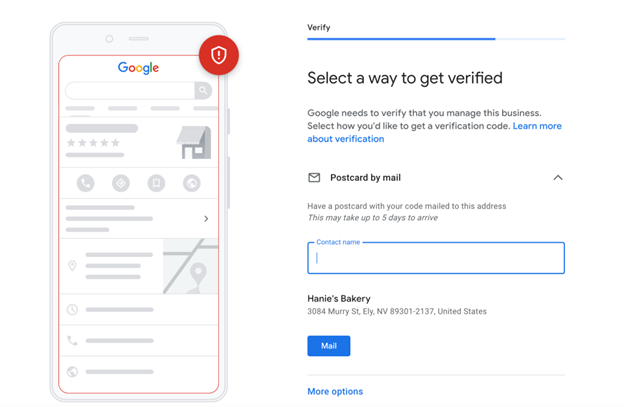
Google needs to know your business is actually what and where you say it is. So, after inputting your phone number and address, you’ll provide a contact for verifying where you’re located.
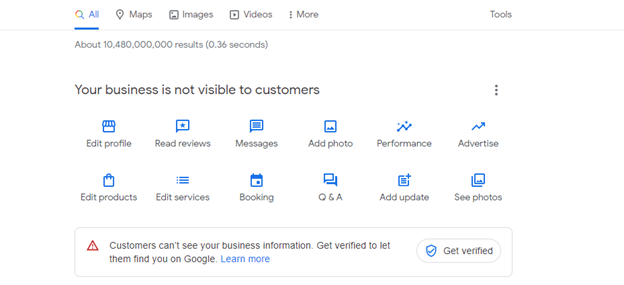
Without a verified business, your business will forever remain invisible to customers.
So, verifying your business is as important as listing your business in the first place. Here’s how to verify your profile on Google Business:
How to Verify Your Google Business Profile
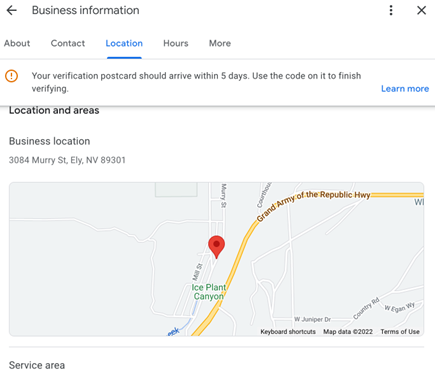
As long as your Google Business profile isn’t verified, whenever you revisit your profile, Google will remind you that your account isn’t verified. To start the verification process, click “Get verified”.
Verification can be done in several ways. You can verify through phone, text, email, or even videos. Sometimes Google might require you to verify using more than one method. But as soon as you get completely verified, you get a notification.
Verification can take several business days before you get a notification. Sometimes you might be unlucky as the verification process you chose didn’t work. That should not be a problem. The “Get verified” button will show up again. That is just Google’s way of telling you to choose another verification method.
After verification, your business doesn’t get across Google immediately. It might take a few weeks. You should also note that Google sometimes may ask a verified business to verify again. To re-verify, just go to your verified Google Business profile and redo the steps.
Google Maps and Business Profile Optimization
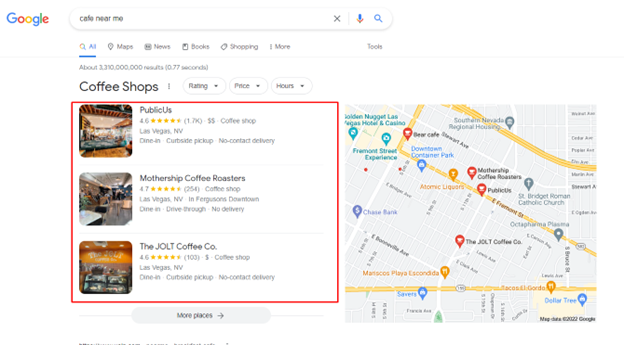
Have you ever looked for a service online? For example, a café. As soon as you type, a cafe near me, Google pops up three businesses for you with an option to see more businesses by clicking on “More places”.
You are probably not always patient to click on the “More places” option. Those three businesses that Google presents to people who search queries related to your businesses are called the Local 3-pack.
There are practices to observe when creating your business listing on Google Maps to help optimize it and increase the chances of being among the Local 3-pack. Let’s quickly take you through those practices.
1. Choose relevant categories
When choosing your category, Google recommends you choose a category that best describes your business. If your business is beyond one category, include all categories that cover all you do. The more detailed information you give here, the more likely it is to be among the Local 3-Pack for relevant queries relating to your business.
2. Optimized description
The description session is an optimization opportunity where you get the chance to tell your visitors all you do. It’s a summary of all you do, what you offer, and what sets you apart from your competitors. It should include a unique value proposition and why your visitors should choose you and not your competitors.
3. Include a review section for your customers
Many people only choose to use a product or service when someone else confirms it to be a great service or product. That’s called social proof.
If you do not allow reviews, potential customers who are keen to know what other users have to say about your business won’t have an opportunity to access that info. This is a huge turnoff to many people. Bring your customers to your business by including reviews.
4. Add high-definition photos of your business
Your business profile on Google Maps is the best place to showcase your business images that best capture the heart of visitors. We advise you to show images of the business environment or your business product that can make your business stand out.
Google Support states that businesses with profile images receive 42% more requests for directions on Google Maps.
Google Maps Marketing Boosts Your Business’s Visibility Online
Setting up your business profile and getting listed on the Google Maps service is just the first step in Google Maps marketing. Getting verified is the second and being among the Local 3-pack is the ultimate step.
If you go through the steps we outlined in this article, you’ll be well on your way to getting the attention your business needs thanks to Google’s incredible maps service. Doing them correctly already qualifies your business as a contender for the local 3-pack.
If you’ve got more questions or need personal guidance from professional digital marketers who specialize in Google Maps, reach out to Cyber Controller for the best results! Click Here to Learn More about Our Local Maps Marketing Service
Frequently Asked Questions
Why should I add my business to Google Maps?
Adding your business to Google Maps increases your online visibility, helps potential customers find your location, and boosts your credibility. It also improves your chances of appearing in Google’s Local 3-Pack, which can drive more traffic and sales.
Is it free to add my business to Google Maps?
Yes, listing your business on Google Maps is completely free. However, you may invest in additional services like local SEO or Google Ads for better visibility.
Do I need a Google Business Profile to be on Google Maps?
A Google Business Profile is essential to add your business to Google Maps. It allows you to manage your business information, reviews, and visibility.
Can I use a non-Gmail email address for my business account?
Yes, you can use any email address to create your Google Business Profile, but using a separate email specifically for your business is recommended.
What happens if my business address is incorrect?
If your business address is incorrect, you can edit it by logging into your Google Business Profile and updating the location details.
